Showing posts with label decor. Show all posts

Sunday, May 13, 2012

How To: Make Wood Shim Decor

See? I told you I would be back! And in less than a week, at that! Feeling pretty good about it--I didn't lie to you!

So last week one of the projects I said I would be working on was a wood shim wreath.  Well, I made it. And now I'm thinking that I like it better as decor, rather than a wreath. Even though I'm using it as a wreath.....It's totally inspired me for my other huge undertaking, The Baby.Cheniful Nursery. I'm thinking I'm going to do them in lots of colors and sizes for the wall behind the crib. But I won't start that project until after June 4th, Gender Day!

Chenyways, here's how you make a Wood Shim Whatev (wreath or wall decor, or table centerpiece, etc).

Ingredient List:
1 pack of wood shims (14 total)
Spray Paint of your Choice--I'm favoring orange these days
Hot glue and gun

Step One:
Set up your design. I used the paint can as the base to work around. Row 1: 7 shims. Row 2: 7 shims, staggard. This left my design at 17.5" in diameter. If you're looking for something bigger, use a larger base and buy more shims!
  

Step Two: Get to sprayin, girl! You'll need a couple coats.
Step Three:  Form your design around the base again, hot gluing the ends together.
Step Four:  Flip and Glue.
Step Five:  Glue your top layer, then flip and glue again.  
Step Six:  ROCK IT GIRL!

That's it! Now go make something awesome!
Big (Oooh, this would make a good mirror base, too!) Smile,

Thursday, March 22, 2012

How To: Chevron Pattern Easter Wreath


Well, hey girl, hey!

Considering it's practically summer here in Michigan--for real, 86 yesterday--and my daffodils are already up, you'd think we skipped Easter all together.  Nope, not so much!  Still two more weeks to go and I still have my St. Patty's Day wreath up.  I'm calling it my Michigan State University (GO STATE!) wreath--it IS March Madness, ya'll!  (yo, did I just say ya'll?)

Chenyways, I did make an Easter wreath (SHOCKER) and thought I'd show you!

I worked with the top of the wreath facing me.  It's how I roll.
Ingredient List:
Wreath Form (mine came wrapped in burlap)
Plastic Eggs
Hot Glue
Hot Glue Gun
Ribbon


Step 1.   Determine your egg pattern to be used on the wreath.  Here we're using a Chevron Pattern (Charlie Brown Stripe) in assorted colors.

Step 2.  Starting at the top of your wreath, begin hot gluing your eggs into "V Shape" patterns, as shown.

Step 3.  Continue your pattern around to complete the wreath, gluing egg tips together to secure your wreath.

Step 4.  Tie a bow at the top of your wreath to finish it off. 

Step 5.  Rock it girl!  Hang that baby up and enjoy for the next 2 weeks! ;-)

Big (Momma Nature is totally skipping Easter!) Smile,
Wednesday, December 28, 2011

How to: Mod Podge an Initial Letter

Pin It


Hi Friends!  :)

I hope you are all having very merry holidays this week and last.  :)  I am!  We had a great time on vacation in Cozumel from the 16th to the 23rd and then spent time with the fam(s) on the 24th and 25th.  I was lucky enough to have Monday off as well and spent the day laying around with Bacon and Cheesy.  We missed those babies SO HARD!  No really. Like talked about them ALL THE TIME--on the beach, at dinner, at breakfast, during nap time--and even would pull up photos because we have no life missed them so much.  Chenyways, we had a blast but we're happy to be home. The End.

Ok, back to B.Cheniful.  So last night J Chen was stalking me asked me where a new post on the blog was.  I mean, damn boy, we just got home!  Was he not aware of the entire paragraph of life I just wrote above?  Yo, I've been BUSY!  But....he was right, it was time to get my butt in gear and do something!

Ingredient List.
I feel like this may be coming a little late in the season--when I did this project it was for the holidays--but it can be applied to pretty much anything.  I mean, this initial I'll be showing you turned into an ornament, but could just as easily be used as decor, or even on a wreath.

Alright, enough rambling, let's just get started!

This tutorial has A LOT of photos.  I think that's ok, yes?  We'll just call it a "picture tutorial".  There, done.

Ingredient list
Initial Letter of your choice--mine was a cardboard type, but it could be wood or foam, etc.
Mod Podge
Foam Brush
Paper to cover--I used wrapping paper, scrapbook paper is great too!
Scissors/Exacto Knife
Ribbon or Twine--Optional

Step One:  Start with your paper about twice the size as your initial.
 Step Two:  Turn your initial over so it's backwards.  Apply Mod Podge to side and top as shown, and bottom (not shown):
Step Three:  Place initial on paper giving you enough space to wrap the paper on the side and over the top, as shown:
Step Four:  Firmly press paper to Mod Podge sides and smooth out any bubbles, as shown:
Step Five:  This is where is starts to get tricky......and messy.......and well, crafty. ;-) Cut into the corner of the paper, as shown:
Step Six:  Now, cut out a little piece of paper and fold in half to make a corner, as shown:
Step Seven:  Mod Podge corner and apply paper, as shown:
Step Eight:  Mod Podge the inside of the bottom initial and fold up the side of the paper.  Flip Over the initial and Mod Podge the top, as shown:
Step Nine:   Press paper firmly to the top, smoothing out any bubbles.  Flip initial back over and begin folding up the paper to cover sides, as shown:
Step Ten:  At this point there's nothing left to do but wing it!  I had to add little pieces of the paper to fill gaps--but that's why you do it on the back side!  No one will ever know ;-)  A tip:  If you're having trouble with the ends, just wrap them like a present :)
Step Eleven:  Once your initial is totally covered in paper, go ahead and place a layer of Mod Podge all over it, as shown:
Step Twelve:  Now let that baby set until it's dry to the touch--then go ahead and add another layer if you want.  Up to you girl!

Step Thirteen:  Place your ribbon or twine (if you're using as an ornament or wreath-whatnot) around the initial to hang and.....ROCK IT GIRL!  MMMMM HMMMMM.  
Keep going......Keep rockin!
That's it!  Ok, so it's not the easiest project in the world--not by a LONG SHOT--but it's a project that allows you to eff up and keep moving on.  And those my friends, are my favorite :)

Big (Dang Picture Tutorial!) Smile,

PS--in case you were wondering why I did an "F" as opposed to a "C" (you totally were, weren't you?!?!) it's because I did this for work. The "F" is a tribute to the founder of our company who passed on Black Friday, at 91. Kinda fitting since we're a retailer. He will be missed.

Tuesday, November 22, 2011

A Very Merry Holiday Sunburst Mirror

Pin It

Hey girl Hey!!!

Well look at me!  Posting 2 days in a row?!?  Nuh Ugh!

It's true.  I mean, I guess when your last craft show was less than stellar it leaves you with lots of time and inventory on hand.

On my way home last night I stopped by the Dollar Tree to pick up more Sundae Cups for Pincushions.  As Dollar Tree visits always go, I ended up walking out of there with only 2 sundae cups (all they had left...WTF?)  and 25 other items.... ;-)

We're hosting Thanksgiving again this year and I really wanted the house to be quasi-decorated for Christmas already.  I spotted some super cool ornament picks that I knew instantly would make an awesome Holiday Sunburst Mirror.  I mean, shocker, right, that I would make a holiday themed sunburst mirror?  Halloween, anyone?    Not to mention just my love of them.  Ginormous mirror, anyone?

Sunbusrt mirrors make a HUGE impact for minimal dolla-dolla-bills-ya'll.

Make one with me!  Here's your ingredient list:
Glitter Picks from the Dollar Tree
5 inch mirror--found at Hobbit Lobbit
2 Packs of Large Ornament Picks--Dollar Tree
3 Pack of Medium Ornament Picks--Dollar Tree
1 Pack of Small Ornament Picks--Dollar Tree
Hot Glue (LOTS OF IT) and Glue Gun
Wire for Hanging.


I really don't believe that there is a right or wrong way to do this.  What I do is start spacing out the largest picks evenly around the mirror.

Then I just fill in as I go with different sized picks.
I indented the smallest picks.
Do that until you're satisfied.  It's your Holiday Sunburst Mirror Girl, Rock it how you want it!
A clear sign you're doing an awesome job?
When it looks this good from the back!  :)

I added a little piece of wire to hang with to the back.  Then....Well, I rocked it girl!!!
Hung above my mantle.
AND, on my way home, I'm stoping for more to make 2 more little ones to go with it! I'll update that later!
Whoop!  There she is!  :)
My stepmom said something about the mantle looking
like it has a smiley face....now I can't stop seeing it!


Rock your holidays!

Big (Sunbursting) Smile,


Thursday, October 20, 2011

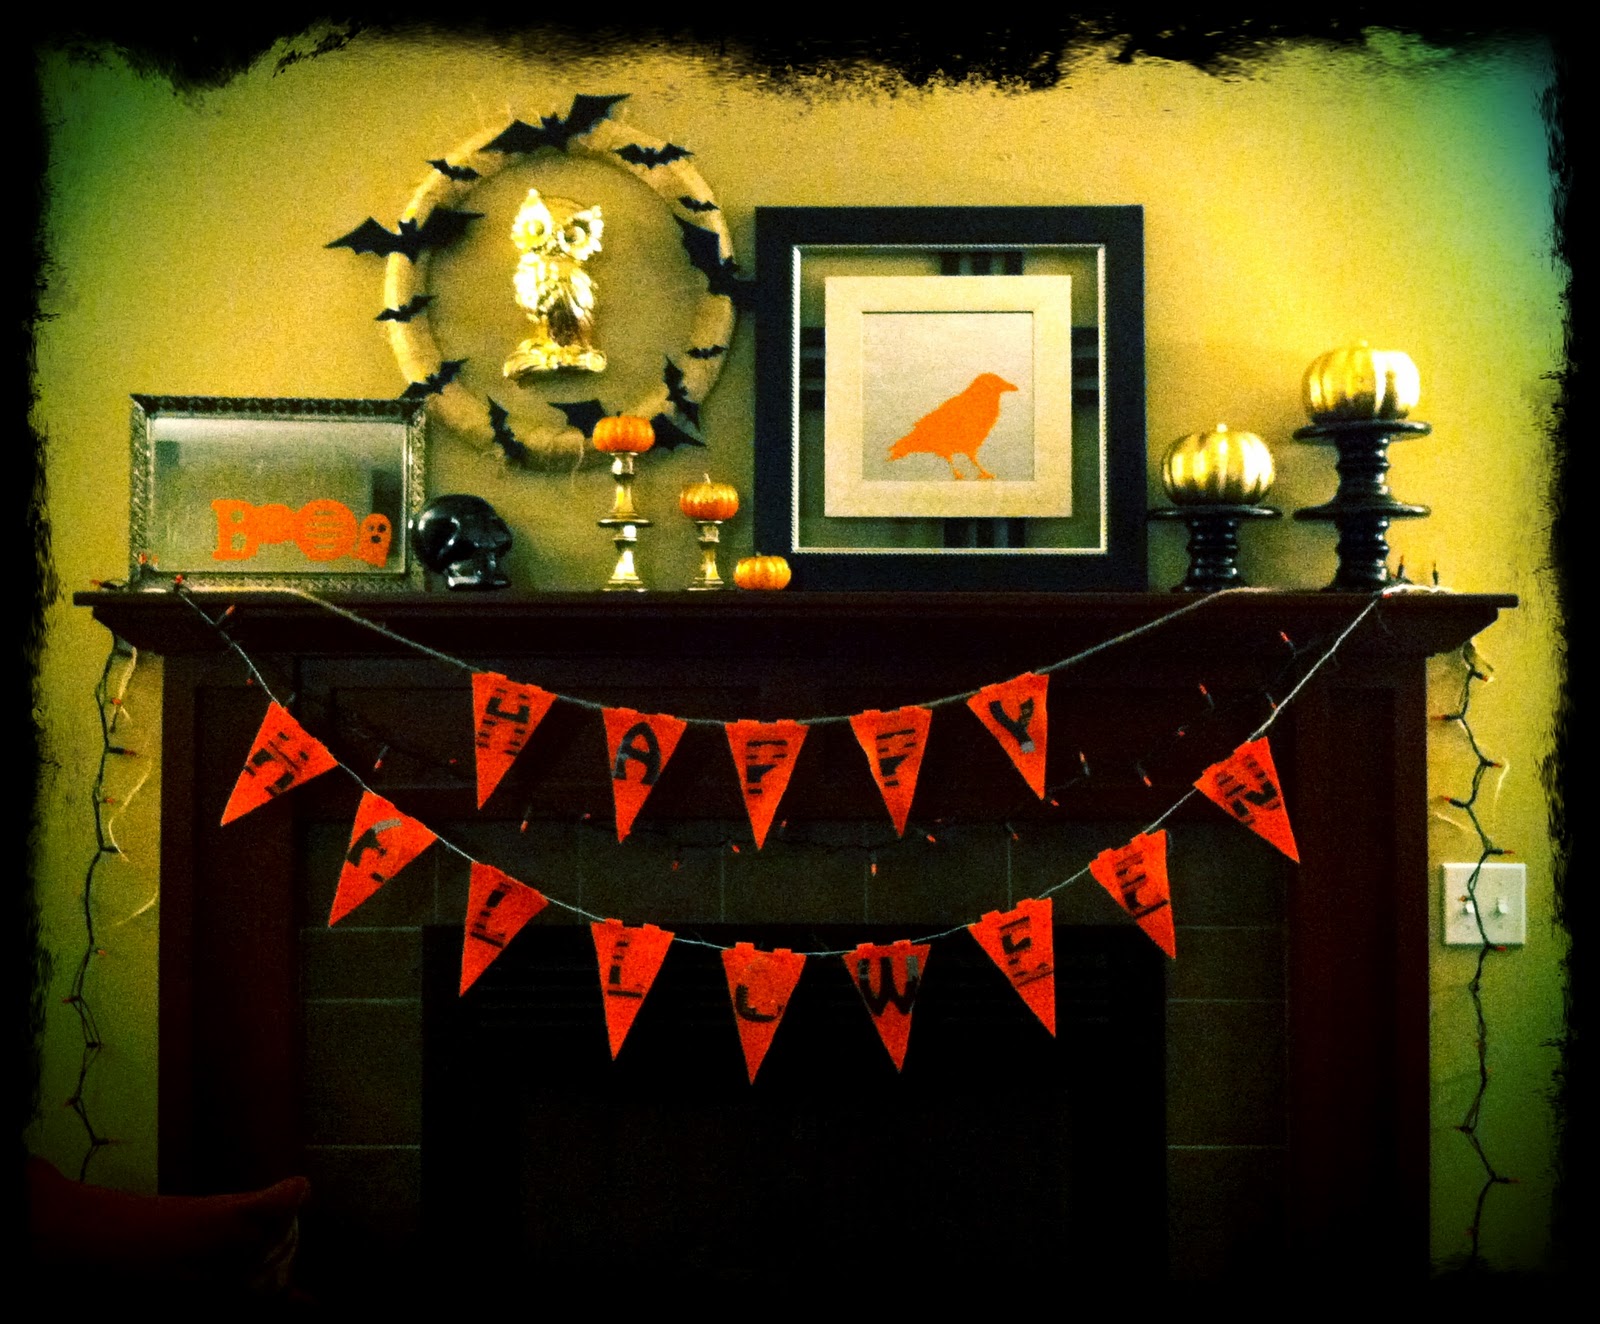
Halloween Decor--on the cheap GURL!

Pin It


Happy thirsty Thursday Girls!!!!  Wow, can I just say THANK YOU for all the support on my last World's Biggest Whiner post?  For those of you who didn't read all about my timing whoas on Halloween Decor, I was basically complaining that I don't have enough time in the day to hand-make all the things I'd like to, and OMG, am I really about to BUY Halloween bunting?!?  Well, here's the update:  I DID buy it.  But I also made my own.  I totally caved.  In fact, I caved so much that I pretty much did hand-make and upcycle everything.  What is my deal?  I don't know, it really didn't take me as much time as I thought it would, seems how almost everything I used I already owned, or had on hand. Except for being one felt sheet short for my bunting.

So....wanna see my crazy go halloween stuff???  OK!
The Mantel.....Isn't she a beauty?  This is my first ever holiday driven mantel, you know, cause J Chen gets a little territorial on such things.....

The Bunting:  Made using the Sily as a pennant stencil and cutting out of orange felt. The letters were also cut from the Sily and hot glued to the pennants.  I used Jute and then some other weird jute-like rope I had (when the jute ran out).


From left to right....
The Boo Mirror Tray:  I picked up the tray from my favorite thrift store on half-off day over the summer for about $2.50.  I added the orange "BOO" using vinyl and my Sily.
Left side of the Mantel
The Black Skull:  Picked up from $ Tree and spray painted a glossy black.
The Wreath:  I used a large wire frame and wrapped it in burlap.  Next I cut out the bats using my Sily and black poster board from the $ Tree.  Then I just hot glued them on.
The Gold Owl:  LOVE HER!  I picked them (there's another!) up a couple weeks ago from a vintage shop for $2 a piece.  Engraved in the clay on the back is "1975" and a name.  VINTAGE YO!  I spray painted them gold.
Gold Candle Sticks and Mini Pumpkins:  I picked up the candle sticks at the $ Tree over the summer.  I spray painted them gold and then hot glued one on top of the other.  The mini pumpkins are REAL!  I painted on white glue to the tops and added gold glitter.  You can't really see them that well though....

The right side of the Mantel
From Right to Left:
Gold Pumpkins and Risers:  The pumpkins are also from the $ Tree, spray painted the same gold as all the other items.  The risers were used at our wedding in December 2007 for our candy buffet.   We start trends, ok?  Ok.  :)
The Mirror with the Crow:  The mirror was a Christmas present from my Mom in 2006 or 2007.  I added the crow using orange vinyl and my Sily, silly!  J Chen said it looked like Edger Allan Poe.  It's not a RAVEN, ok?

I'm planning on making a tablescape for the actual party, but I won't be able to get final pictures of that until that day.  Cause we're using our kitchen table, and again, J Chen gets all territorial over common areas.....BUT, I am able to show you this custom sunburst mirror I made just for the spot!

Try it yourself with my sunburst mirror tutorial!  
I used a plastic skull platter from the $ Tree and spray painted it black--as well as all the wooden dowels I had laying around (broke in half).  I had the mirror from a previous trip to the Hobbit Lobbit.  The little gold things on the dowels are spider and bat rings from the $ Tree, spray painted the same gold as every. thing. else.

I can't wait to show you the rest of the tablescape then it comes together!  Sure, it will likely be past Halloween Party Time, but you know, there's always next year :)

PS, I'll be using the store-bought bunting on the tablescape ;-)

Big (why sleep when you can create?) Smile,

Wednesday, September 28, 2011

All that Glitters, Indeed.

Pin It


Oh Hey!  Wanna see what happens when I wake up at 3:30am and can't get back to sleep?  This, amongst other things:

Oh yeah, that's a string of sequins wrapped around the wreath.  And yes, that's glitter on those felt flowers.  Put there myself around 5am using spray adhesive, dollar tree glitter and a good lean over the toilet.  Won't J Chen be surprised!  My hands are covered (read glued) in glitter as well.  Should bode well for my professional career at Corporate America, USA.

I didn't intend on this wreath going all Ke$ha, (OMG, LOVE HER!) it just happened.  I can't explain it.  But you know what?  I kinda LOVE it.  I might have to keep this for myself.... You see, I'm currently gearing up for a bunch of craft shows, and I'm not sure that this would sell?  Like, it's CLEARLY fabulous, but likely only to crazies like myself. We R who we R.  :-)  (another Ke$ha ref, just in case you weren't up on her crazy!)
a little glitter shot for you--you're welcome.
Ah yes, a face only a mother could love.
Oh yeah, and if you don't hate this bad B, leave me a comment, ok?  :-)

Have the best day ever!

Big (throw some GLITTER make it rain) Smile,