Girlfriends! What's up!?!?!

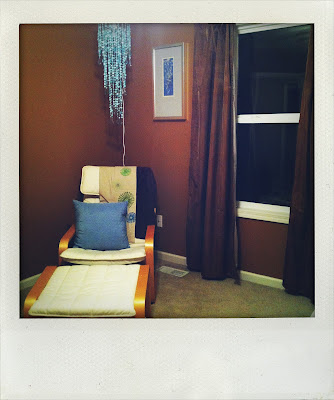
So, I've started on Paisley's nursery....and it, my friends, is a labor of love! Especially when you decide that at least 97% of decor will be DIY. Which I did. And am in the process of doing.......
Today I wanted to show you these cute DIY pillows I made for her Nursery. I did two different versions--the Envelope-back pillow, and one made out of a cocktail napkin and flat sheet.
First up, The Envelope-Back Pillow:
Ingredient List:
Pins
Sewing Machine
Your choice of fabric--I used blue chevron (above)
Pillow--I used this old one that we have had in our linen closet the past 5 years....(from J Chen's "I don't wanna be a playa no more" days. Ha! Like he was EVER a playa!)

Now, I didn't do a tutorial, because, well, girl I can barely sew! I totally winged it. However, I did find this awesome one for you use--I was pretty close to perfect. Heeeeyyyyyy girrrrllllll!
Next! The Cocktail Napkin and Flat Sheet Pillow. For reals.
Ingredient List:
Pins
Sewing Machine
Cocktail Napkin--or a Fat Quarter/Square of Fabric--of your choice. I used that cool orange paisley napkin (above).
Flat Sheet--or whatever fabric you want for the back! I just had some remnants left over after slip-covering the chair above in a white flat sheet.
Stuffing--I used an old pillow I found in a closet and cut it open. Ha!
Now, I also didn't do a photo tutorial for this, but that's because it's stupid-easy.
Step One: Depending on what fabric you're using, make sure to cut your squares evenly. I laid the sheet over the napkin and cut to that size.
Step Two: Place the pretty sides of fabric together (the sides you'll want on the OUTSIDE of you pillow) and pin.
Step Three: Sew around the edges, leaving about 2 inches open for the stuffing. Turn right side out.
Step Four (Optional): At this point, your pillow is almost done. (Yay, you!) Now, this where I added the "P" inital you see above. I used my Sily (silhouette machine) and cut out a large "P" on dark pink vinyl. Then I ironed it on the front.
Step Five: Stuff it, girl! Using whatever stuffing you have, stuff the pillow to the size you like.
Step Six: Either sew, glue, or use some interfacing to close the stuffing opening.
Step Seven: ROCK IT GIRL!

There you have it, 2 totally unique DIY pillows! All for you! Enjoy :)
Big (Pillows can make a room!) Smile,


So, I've started on Paisley's nursery....and it, my friends, is a labor of love! Especially when you decide that at least 97% of decor will be DIY. Which I did. And am in the process of doing.......
Today I wanted to show you these cute DIY pillows I made for her Nursery. I did two different versions--the Envelope-back pillow, and one made out of a cocktail napkin and flat sheet.
First up, The Envelope-Back Pillow:
Ingredient List:
Pins
Sewing Machine
Your choice of fabric--I used blue chevron (above)
Pillow--I used this old one that we have had in our linen closet the past 5 years....(from J Chen's "I don't wanna be a playa no more" days. Ha! Like he was EVER a playa!)

Now, I didn't do a tutorial, because, well, girl I can barely sew! I totally winged it. However, I did find this awesome one for you use--I was pretty close to perfect. Heeeeyyyyyy girrrrllllll!
Next! The Cocktail Napkin and Flat Sheet Pillow. For reals.
Ingredient List:
Pins
Sewing Machine
Cocktail Napkin--or a Fat Quarter/Square of Fabric--of your choice. I used that cool orange paisley napkin (above).
Flat Sheet--or whatever fabric you want for the back! I just had some remnants left over after slip-covering the chair above in a white flat sheet.
Stuffing--I used an old pillow I found in a closet and cut it open. Ha!
Now, I also didn't do a photo tutorial for this, but that's because it's stupid-easy.
Step One: Depending on what fabric you're using, make sure to cut your squares evenly. I laid the sheet over the napkin and cut to that size.
Step Two: Place the pretty sides of fabric together (the sides you'll want on the OUTSIDE of you pillow) and pin.
Step Three: Sew around the edges, leaving about 2 inches open for the stuffing. Turn right side out.
Step Four (Optional): At this point, your pillow is almost done. (Yay, you!) Now, this where I added the "P" inital you see above. I used my Sily (silhouette machine) and cut out a large "P" on dark pink vinyl. Then I ironed it on the front.
Step Five: Stuff it, girl! Using whatever stuffing you have, stuff the pillow to the size you like.
Step Six: Either sew, glue, or use some interfacing to close the stuffing opening.
Step Seven: ROCK IT GIRL!

There you have it, 2 totally unique DIY pillows! All for you! Enjoy :)
Big (Pillows can make a room!) Smile,


