Monday, June 27, 2011

100 Followers Giveaway! :-)

Infinity Scarf Giveaway
Giveway now closed.

Oh hey GURL hey!!!!  (and hi J Chen).  Holy WHAT, I reached 100 followers today!  Actually as I write this I have 110 and I couldn't be more THRILLED!  THANK YOU so much!  Seriously, this is so crazy exciting to me.  :)  Blogging is a lot of work and you all keep me going--so thanks again!

So, to celebrate, I have a giveaway for you!!!  This is where you yell HELL YEAH!  Free stuff is the best stuff!  Amiright?  MmmmHmmmm.

Wanna see what I have for you????  Remember that infinity scarf I wrote about the other day?  Well....Looky Looky--this one is for one of YOU!  Hot Pink and light enough for a cool summer night.  Wear it like you mean it!

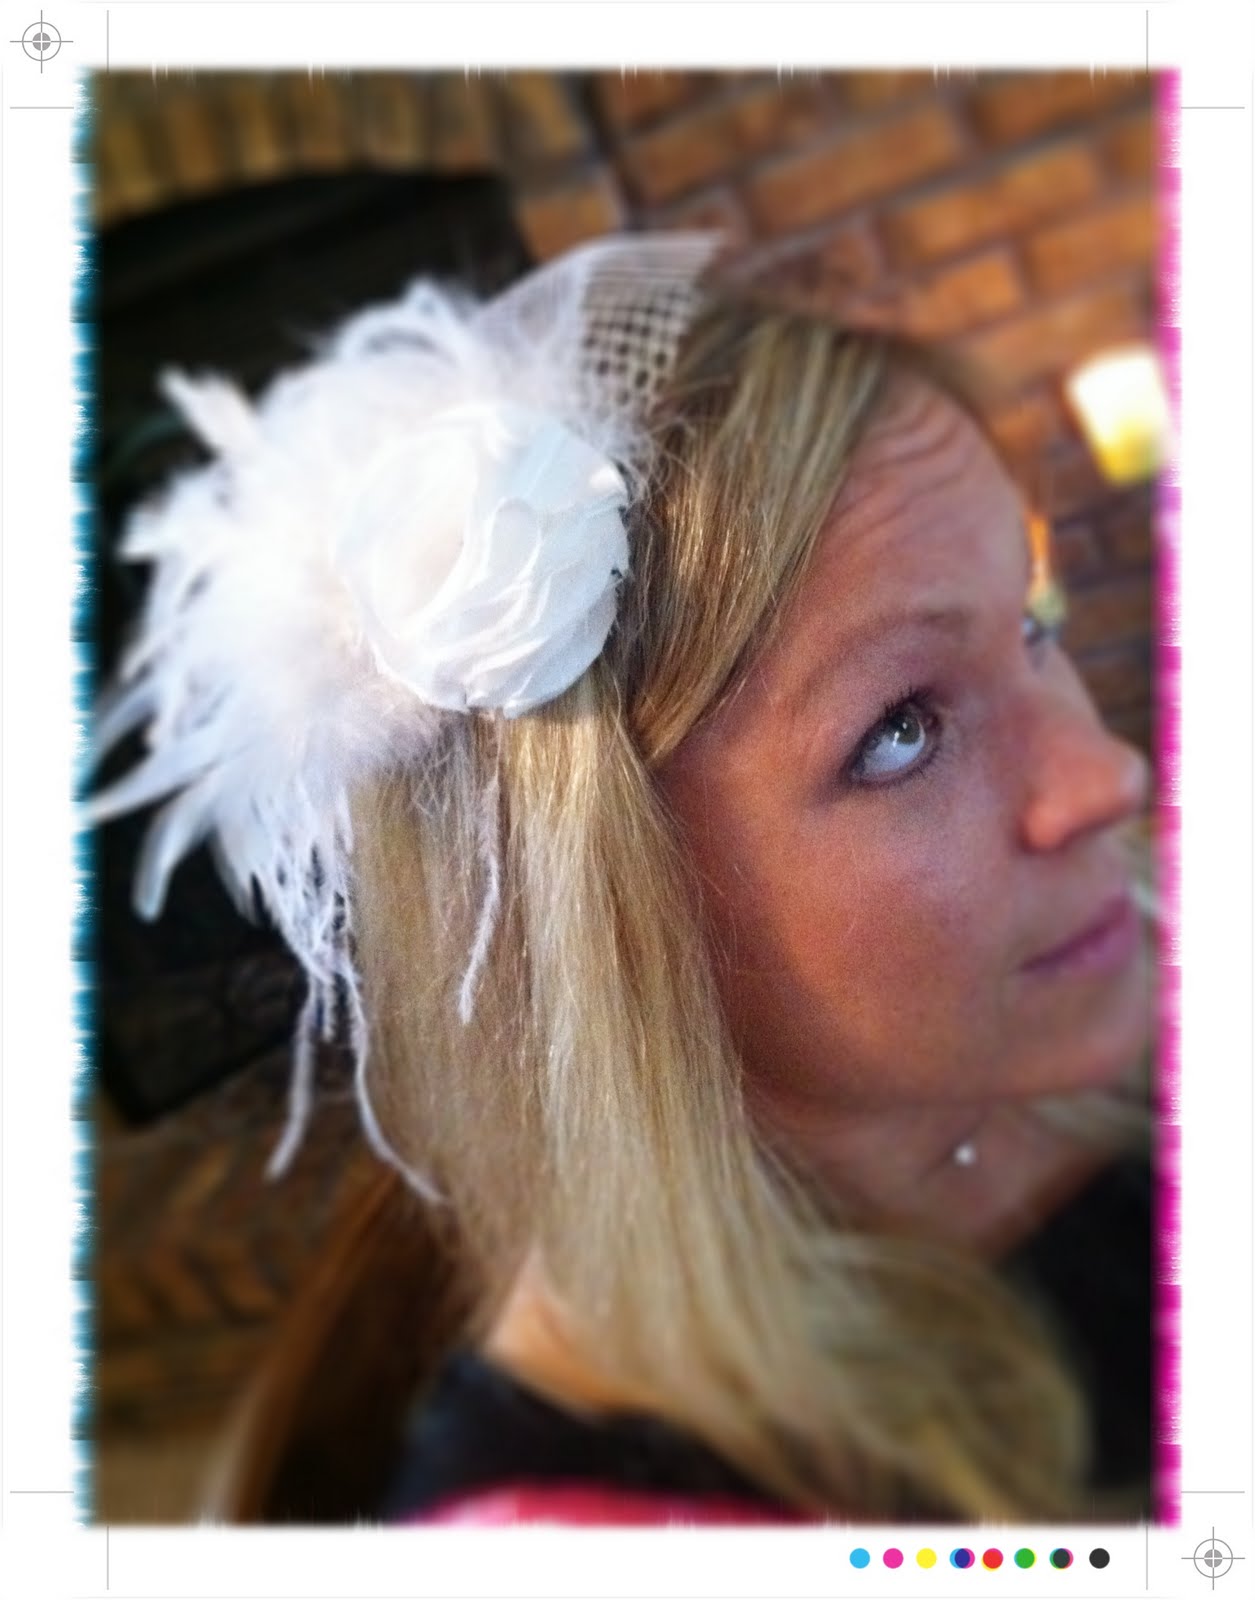
I ALSO have another giveaway to go with it!  You'll be rockin a cute as a button hairband to go with your infinity scarf! Best part, it's totally custom to YOUR taste.  Looking for inspiration?  Maybe a couple of these might give you an idea ;-)  You just let me know.  :-)


Cute as a Button Hairband--You Choose your colors!


So....wanna play?  I'll promise to keep it easy for you--I'm not down with blogs that make you jump through hoops--wait, go to that site's site's site, and tell me what hoop you like!--so it should be pretty painless.  :)


The how-tos of winning!  Please leave a separate comment for every individual entry to increase your odds with your EMAIL.  
1.  You gotstabe a follower.  Afterall, that's what this giveaway is all about--You awesome gurls!  Tell me about it in the comments.
2.   Like my Facebook Page!  Tell me about it in the comments.
Yep, that'll pretty much do it!  :)  Easy enough?


If you're already doing those things already....Well, you're AWESOME!  Be sure to leave me comments anyway--otherwise I can't count it.  

Giveaway closes Friday, July 1st at Midnight.  The winner will be emailed on Saturday.

AGAIN, thank you all so much for following B.Cheniful.  Much more awesomeness to come!

Big (100!) Smile,
B.Chen

Saturday, June 25, 2011

$5 DIY Sunburst Mirror

Pin It
Oh heeeyyyyyy!  :)

Wanna see what I made the other night?  Cause I REALLY wanna show you!  This might be my proudest DIY moment....I mean, let's not get crazy here, surely I'll do cooler things at some point, for now this baby takes the cake!

I've had an appreciation for sunburst mirrors for quite some time now--I have a thing for mirrors in general--but I never found anything that I was all like, oh hell yeah, that's totally worth my $200!  BRING IT.  Not. So. Much.  For reals though, why are these suckers soooo pricey?  Cause they're hand-made?  So's mine.  It's B.Chenified.  And was about $5.  Let's talk about it....what I'm trying to say is, whatever they can do, I can do cheaper ;-)  Notice I didn't say better.....cheaper.  :)  Ok, and AWESOME.

Ingredient list
*PS, this is a HUGE mirror.  over 3.5 feet in diameter.  you can make it in any size you want, you'll just need to wing it a little.  Yo, that's how I 
go through life....it's not so bad.  ;-)

  • skinny bamboo sticks--Mine were from The Dollar Tree and I used 1.5 "packs"
  • (1) 10" mirror--mine was from the hobbit lobbit in the candle area.  It was 50% off at $3
  • (2) Round cardboard cake base, 5".  I bought these awhile back for a different project.  you can find them in the baking aisle at Michael's in sets of 5s.
  • A LOT OF GLUE STICKS.  Seriously.  I use both a low heat gun (for setting the sticks) and a high heat gun (for attaching the mirror and securing it all)
  • Something to hang it with....I used a string of hemp, staples and a fabric scrap.
  • Measuring tape
  • Scissors
  • A wall that needs so sprucing.  :)
LET'S DO THIS!
*One last disclaimer!  This is a BIGASS mirror and that's the way I'm teaching it.  K?  Perfect.
Step one:  Ok, for your sticks...Mine were about 42" inches high.  I cut one (1) stick down to (2) 13" sticks, and whatever was left at the end, about 15"-16" inches.  So 3 little sticks per 1 big stick.  Now do that to all of them.  I'll wait.  :)  PS, I used scissors on this.  No fancy saw or anything. 


Step two--Follow the images below!  
(images 1 and 2):
Take one of your cake rounds and start glueing down your sticks, thinking of a clock.  Start placing your 13" sticks at 12, 3, 6, 9, then go back around and place in the middle of those sections and so on, filling up the sides.  I used the low-heat gun for this.
(image 3):
sweet baby bacon helping his mama!
Now you want to place your longer sticks every 3 13" sticks or so.  For me, well, I don't really do directions well, so some of mine longer sticks are every 3 or 4 or 2 13" stick.  Wing it, remember?  :)
(image 4--the purse looking thing):
Ok, it's almost time to attached the second cake round, but first you need to attach your hanging mechanism if you will (and I think you will).  I took my string of hemp and stapled it on the cake round, then glue it down, then glued down the fabric strip.  I switched to the high heat gun for this.
(image 5):
Now you can glue your second round with the hangy thing down, covering the top of your sticks.  Next, glue into the rounds, really securing the sticks to the rounds.  High heat gun for sure--watch your fingies!
Step three (ok, step 8 or 9):  Guess what time it is?  Time to high heat glue the mirror on to the top cake round!  Yeah Yeah!!!!!  Really burn through glue stick here--seriously, go crazy.  You don't want this beauty falling off the wall!  that would be 0% cool.

secure those suckers!
Step four:  ROCK IT GURL!!!!!  Oh yeah, find that perfect place for this sexy b, and start bragging to your friends.  Hey gurl hey, lookie what I MADE.  For $5!!!!  Now go buy some hot heels--you deserve it!
what's rockin at the Chen House!
one last look, for good measure.  :)
Big thanks to my J Chen for hanging it for me on Friday afternoon and then face-timing (what up iPhone?!?!) me while I'm at the office to show me!  I heart technology!  Oh, and Leah, no worries, the clock will be reappearing down in the living room.  :)

THANK YOU SO MUCH for stopping by!  

Big (BURSTING) Smile,
B.Chen


Monday, June 20, 2011

Just something I whipped up...

Pin It

No, really.  A literal whip up.  I was just messin with felt circles and made this necklace on a whim.  I can't actually remember what the original intention was for these guys, but I thought a necklace was as good as any other idea...
Man, I LOVE my padded bras!  I'm almost a B cup here--ALMOST.  
Sorry there's no actually tutorial here....again, just a whip up!

Thanks for stopping :)

Big (padded bra) Smile,
B.Chen

Thursday, June 16, 2011

infinity t-shirt scarf

Pin It
Last Friday night I sat down to make the bachelorette boas (cause I'm cool like that on a Friday night) before the next nights activities. Now, before I dig in to any project I like to make sure I have a bottle of wine and a snuggie I'm situated so I don't have to get up in the middle of my creation process.  Yes, it's a process. Well, I realized that I was cold.  I was already in my fancy Friday night ensemble (workout pants/tank/sweater--no really, livin it up!) so I didn't really have another layer to add.....I decided to throw on a scarf.  You know, like 1 out of the 900 that I have hanging behind the closet door.  Apparently those were not cool enough for me.....so what did I do?  I think you know where this is headed--I MADE a scarf. Seriously.  Total impulse crafter.

*side note!  I live in Michigan, where it was 50 degrees last Friday--JUNE 10th--and I would have been happy in a snowsuit.

So, how does one just whip up a scarf in under 20 minutes?  You know, when she has a night of work ahead of her?  Well, she grabs an old sweater, a pair of ginghers and gets to it.

Now, I forgot to take pictures of the creation process on this gray guy, so I made another one tonight to gift to my food stylist friend Laura ( for reals, check out her work!) who is fantastically fashionable, in a rich hippie sort of way, and snapped away.

Enough of my ramblings--on with the goods!

and PS, this shirt is actually blue, not periwinkle.  Gross.  I do not have a $500 real camera.


ingredient list
- sweater or t-shirt--I'd say no bigger than a large or your circle will get OOC
- scissors


Step One:  Lay shirt flat and cut long strips across, measuring 1" a part, around 14-16 strips is ideal .  *tip, make little slits every 1" then cut into long strips.  You'll also need to cut one 4" inch long strip (still 1"H) for every long strip you get.

Step Two:  cross individual strips a total of 2 times so your circle has four rings total.  
they look like donuts--my FAV!  
Step Three:  Remember the part where I totally mumbled something about extra 4" strips back in step one?  Yeah, you're gonna need those now....use one 4" strip to connect 2 of your circles, double knot.  Keep doing this until all the circles have been joined together, making an infinity loop.
tie tight!!!

officially infinitified.
Step four:  Trim off any hangy-part of the connector strips.
Step five:  Rock it GIRL!!!!   Rock it like you MADE it--cause ya did!  

Told you it was actually blue!  :) 

 And there you have it!  I hope Laura likes it :)

As always, THANK YOU for stopping by B.Cheniful!  You're the bestest!

Big (It's blue!) Smile,
B.Chen


(one of the) Best things about being an adult????

This.  
Eating the center of the watermelon.  Bet your mom never let you do that!?!?!

Yep, being an adult ROCKS!  Well, most of the time....there's that thing about bills/responsibilties/mortgage/career......even still, it's the little things, like eating the center of a watermelon, that really makes it all worth it!  :)

Big (adult) Smile,
B.Chen

Tuesday, June 14, 2011

what happens in royal oak......

Pin It
Lisa and I
Hey girl hey!  OR, hey boy hey!  I mean, just in case I'm lucky enough to get some manly readers (next to J Chen that is).

So girlfriend Lisa is getting married on July 1st and we all know what happens a couple weekends before the big plunge....  Total debauchery  Girl's night out!  Lisa's MOH Anglea--about to be a momma!--organized the best bachelorette party in history.  Seriously, down to the doritos in the limo for my fat ass, she did an amazing job with all the details.

The B.Cheniful part of this post?  Guess who was in charge of dressup?  Yeah Yeah!

First order of business--the bride.  Lisa is well, very particular.  She knows what she likes, she knows what she hates.  And she'll tell you flat out about either.  So yeah, I ended up making her 3 different hairpieces before I was sure she wouldn't hate me for it.

I intended to make her sash myself using transfer printer paper and well, that just sucked.  So I ended up having to run to Party City the day of in hopes of a not-so-cheap-looking sash.  I was able to find one, iron out the wrinkles and add a couple handmade flower pins to make myself feel better spruce it up.

That's one hot mama--and by and far the best dressed/accessorized bachelorette of the evening!
Damn GURL!
A close up of the hairpiece
Next?  Why the LADIES of course!  I've always admired bachelorette parties where the group actually looks like a group.  The same something for everyone....So, I decided to make super cute hairpieces for everyone going out on the cheap....
these would be the "round stone thingys"

the ingredient list:
1 black feather boa $5.99
1 hot pink feather boa $5.99
1 package of bobby pins $.88 (what up CLEARANCE!)
1 package of round stone thingys... $3.99
4 sheets of black felt $1
total:  $18 for 10 hairpieces, PLUS left over feathers and pins

step 1:  cut feathers into 4"pieces and set aside. cut felt into 2" circles, set aside.


step 2:  on felt round, glue down one black and one pink 4" boa piece, allowing much of the feathers to come off the top of the round (see below to figure out what the hell I'm really trying to say here!).


     step 3: glue down the round stone thingy to the non-crazy-feather-side of the hairpiece.  Lastly, glue down any feathers going willy-nilly and then a glue bobby pin to the back of the felt.


     Step 4:  ROCK IT GIRL!!!!!  MmmmmmmHmmmmmmmm, go with your bad self!  ;-) 
Lyndsay holdin it down with the side sweep!


My girl Kristen rockin the side pony.


It was an AWESOME night!  Clearly it was all thanks to the hairpieces ;-)  Honestly though, it's not like you get to rock a boa hairpiece every night--have FUN with your bachelorette party!  


***a tip if you decide to try these (and I hope you will!):  if the girls wear the boa on side of the head, you'll likely need to rat the hair and then either bobby pin or pony it up.  Other wise it might slip out when you're shaking your money maker.....
Thanks for stopping by!
Big (feather boa) Smile,
B.Chen

I will likely be linking to these lovely sites:
Linking to:
Monday:Making Monday Marvelous @ C.R.A.F.T. I made the world cuter today @ Making the World CuterJust Something I whipped Up @ The Girl CreativeMotivate me Monday @ Keeping it SimpleMade By You Monday@ Skip to My Lou Metamorphosis Monday @ Between Naps on the PorchMad Skills @ Mad in Crafts Made with Love @ Sew Chatty Market yourself Monday @ sumos sweet stuff Craftomatic Monday @ CraftomaticTuesday:20 Minute Tuesdays @ Sweet FloweretStrictly Homemade Tuesdays  @ Strictly HomemadeNifty Thrifty Tuesdays @ Coastal Charm Anything related @ All Thingz Related Sew cute Tuesday @ Creative Itch Take a Look Tuesday @ Sugar Bee Teach me Tuesday @ The Girl Creative Tip me Tuesday @ Tip Junkie Get your craft on Tuesday @ Today's Creative Blog Amaze me August @ Bella Before and After Show me What ya got @ Not JUST a Housewife Wednesday:We're Organized Wednesday @ Organize and decorate EverythingPenny Pinching Party @ The Thrifty Home Share the Wealth Wednesday@ Love Laugh & Craft We Did It @ Sew Much Ado Power of Paint @ Domestically Speaking Show and Tell @ Blue Cricket Design Hoo's got Talent @ Night Owl Crafting Linkin with Lil Luna @ Lil LunaWhatever goes Wednesday @ Someday Crafts Thursday: Strut your stuff @ Somewhat Simple100 Ideas under $100 @ Beyond the Picket Fence Transformation Thursday @ The Shabby Chic Cottage Hooking up with HoH @ House of Hepworths Show your stuff off @ Fireflies & Jellybeans Inspiring Thursday @ Delightful Order Throw Back Thursday @ Luxe Blvd It's a Party @ A Creative Princess Creative Juices @ momnivores dilemma Addicts Anonymous @ addicted 2 decorating Friday: It's a Hodgepodge Friday @ It's a Hodgepodge Life Feature Yourself Friday @ Finger prints on the fridge Friday Fun Finds @ Kojo Designs I'm Lovin' it Fridays @ Tidy Mom Frugalicious Friday @ Finding Fabulous Pitty Party @ Thirty Handmade Days Flaunt it Friday @ Chic on a Shoestring DecoratingShow and Tell @ My Romantic House Saturday: Saturday night special @ Funky JunkCheck me out Saturday @ A vision to remember Weekend Wrap Up Party @ Tatertots and Jello Saturday Spotlight @ Craft Envy Party Mindie Style @ Bacon Time with the Hungry Hungry Hypo Show and Tell @ Be Different Act Normal Sunday: Not Baaad Sundays @ lamb around You're so Very Creative @ me making do Think Pink Sunday @ Flamingo Toes Scrap Box Sunday @ Hazel and Honeysuckle A Marvelous Mess @ Marvelously Messy Sunday Linky Party @ Petite Hermine K.I.S.S @ The Tattered Rug Sunday Scoop @ I heart Naptime Nifty Thrifty Sunday @ Nifty Thrifty Things Sunday Showcase @ Under the Table and Dreaming Creative bloggers party & hop @ homemaker on a dime

Wednesday, June 8, 2011

life's a beach and then you DIY!

Pin It
Keepin it custom....

I've talked about my friend Lila before, right?  Well, she's an AMAZING photographer who happens to be my neighbor.  She has 2 beautiful little girls and a very handsome husby.  She's fab!   FAB!  Oh, and a big supporter of all things B.Cheniful :)  LOVE.

So when she came to me about a custom yarn wreath for her MIL, Fancy Nancy (ha!), I jumped all over it!  With only a slight hesitation.....It's what I was talking about the other day--when you're doing custom pieces for your friends you want them to be perfect.  Especially when said friend is also quite creative herself.

Lila asked for a beach-themed yarn wreath with little beachy muppets (felties, whatevies) to go in FN's new beach house.  We decided on sand dollars and star fish muppets and a beachy-blue yarn.  Now it was up to me.....

First things first....oooohhhhh, I just promised new muppets.....must find a pattern!  So naturally I went to Pinterest (you can follow me there!) and looked around.  Nada.  At least not quite what I was looking for.  So I took to the WWW.  (dude, when was the last time you referred to the internet as the World Wide Web???)  And.......I found them!!!!


I used this pattern to make the starfish.
I used this guy for the sand dollar, found here.  
OMG, I don't ever want to make another one of these!

Here's what I came up with:
my little muppets!
About that sand dollar--he's hiding behind the star fish for a reason ;)

Henyways, after sending a couple pictures to Lila of my progress and making sure I was on the right track (I was!) I came up with the final product:


Lila snapped these photos for me at the beach house, cause she's sweet like that!  I mentioned she was a fab photographer, right?  Indeed.

And that concludes another yarn wreath post, life's a beach, and then you DIY.  :)

Thank you so much for stopping by!!!!

Big (beachy) Smile,
B.Chen

I was Featured!!!
homemade crafts
Been featured?  Show off! 

Photobucket