Monday, November 21, 2011

Ice Cream Sundae Pincushions!

Pin It

Oh Hey Pretty Gals!

So, you know how I was all worried that I was a total one-trick pony not very long ago, regarding wreaths? Well, look at me now, getting my pincushions on!  Last week I showed you how to make some awesome Cupcake Pincushions that will totally rock your friends/relatives world, and this week I'm going to show you a new twist on more yummy pincushions.

So what happened was I ran out of ramekins and I couldn't find any at the dollar store.  Cause listen, you gotsta keep your costs down, yo!  But what they did have were glass sundae dishes and regular white ice cream dishes.  Well, since I'm super in love with things that look like food, I was all over this idea!

For the ice cream dishes, I made these the same exact way I did the Cupcakes.  The only difference was that I added whipped cream and a cherry.  For the whipped cream, I used fuzzy baby yarn and wrapped it around my 3 fingers about ten times, making a mound.  Then I just glued that on the top of the ice cream and added a little red pom for a cherry.
aren't they super adorable!!!
For the ones that I like to call "Soda Shoppe Sundae", I made these a little differently. Because the glass is clear, you have to be careful about what you're using to fill it.  I used a pink fuzzy baby yarn to fill the bottom; I used the same yarn to wrap a styro ball for the ice cream.  Then I used the same whipped cream method as described above and added a cherry.  I put the pins in the whipped cream for sprinkles.  Totally adorable.  Totally nostalgic.  :)
mmmm, scrumptious!  
So, what do you think?  Clearly I think they're fab ;-)

Big (Saturday, Monday, we all scream for SUNDAE!) Smile,

Monday, November 14, 2011

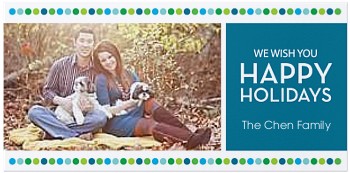
Photo Card

Even with all the craziness of craftshow season I still managed to order my holiday cards!  :)

PS, this was not sponsored.  I'm not that cool.  ;-)


Polka Dot Wishes Holiday
Click here to browse Shutterfly's holiday card collection.
View the entire collection of cards.

Big (Happy Holidays!) Smile,

Wednesday, November 9, 2011

How To: Make a Cupcake Pincushion!

Pin It

Ok, whoa.  Am I ever feeling guilty!  Like, seriously.  I feel like such a jerk for neglecting my blog.  :-(  Eh.

BUT, I'm totally gonna make it up to you with this kickass/easyass tutorial of greatness!  No, but for real, people are going to think you're so effing clever.  Mmmm Hmmmm.  Wanna play?

OK THEN!  Did I mention this was NO-SEW!?!??!  Cause it is.

Ingredient list for a cupcake pincushion:

  • ramekin bowl (cause who the hell knows what else to use them for anyway???)  
  • solid fabric
  • sheet of felt
  • quilt stuffing
  • rubberband
  • hot glue
  • pretty pins
Ok, cause I'm super stretched for time, I'm gonna reference this tutorial for the basics--like, the stuffing the fabric part.  They do a great job!  :)

So, now that you have the stuffing thing out of the way, all you have to do is hot glue the sucker into the ramekin.  Do a good job with this--no glue sticking out the top! Cupcakes are pretty, ok?  OK.  

NEXT, cut a felt circle and then freehand a "frosting" cloud thingy.  Basically a circle with scalloped edges.

Hot Glue that on the top of the fabric--not too much glue, this is a pin cushion after all and people will want to be able to push the pins in!  

Lastly, add your pretty pins to the top to look like sprinkles.  VOILA!  And you're welcome.  Now, tell me who wouldn't want this cutie for a gift?  You need to get some new friends if they don't just LOVE this!  


I love creating awesome things that I know people will adore ;-)
And that's that!  I'd stay for more but I have to make more cupcake pincushions for this weekend.

This is how I display them at shows, on a dessert tier:
see the teacups, too?  They don't sell nearly as well as the cupcakes.
I can't blame the people.  

Big (CUPCAKES!) Smile,

Thursday, October 27, 2011

Bacon, Bacon, Bacon! Handmade Bacon Costume!

Pin It

They love their Daddy!
If you've been reading this blog even a little, you likely know about our puppies, Bacon and Cheesecake.  You know, these guys on the right.

So, this year I had planned on J and I being American Gladiators  for Halloween as a group costume with our friends, George and Blaise.  See, cause last year we went with a group costume of Dazed and Confused and it was AWESOME.  J Chen looked just like Slater!

George as Wooderson, Blaise and I as "Senior Girls"
and J as Slater.  Check ya later! 


However, this year, J decided that he didn't want a group costume, and that since we were throwing a Halloween Party, that we could be the literal versions of Bacon and Cheesecake!  Oh Geez.....Here we go!  Cause we all know what that really means....This girl right here would have to make them....

Here's how I made the Bacon costume:


Isn't he just the world's cutest Asian!  

First, start with your ingredient list that J Chen is so sweetly and totally willingly posing for.

  • 3 Yards of Maroon Felt--about 1 1/2 yards too many, but I messed up right away so I was glad I couldn't do the math.
  • 2 spools of ric-a-rac ribbon
  • Hot glue gun
  • Sewing Machine
  • Dinner Plate
  • Scissors
  • Pins
  • 6 corona lights.


Place the felt over the body.  Just kidding, I totally did this to mess with him!  This step was NOT needed.  Love you Chener!
Casper?  
Really what you need to do first is to fold your felt length wise--cut the width to your specifications....So, this is like a 1 yard and a 1/2.
Sweet baby Bacon helping out!
Next, cut out a neck hole.  This wreath frame was WAY TO BIG, and well, is how I effed it up in the first place.  I would recommend using a dinner plate to measure the hole.

I guess I thought he was as big as shrek or something...
Your next step is to get to fittin!  I slipped the felt over J and then pinned away, making sleeves and such.
J says "this shit is going to be all over the internet, isn't it?!?"  Um, Duh.
Next I freehanded a bacon "sizzle" and then cut it out.  Then fold down the center and make an identical cut.
Fry like Bacon you Freshman Piggies!
Seriously, if you don't know Dazed and Confused, your life is missing something ah-mazing.
 Now pin along the sizzle and sew it up! When I turned mine right-side out I noticed the shape wasn't great....So I just ironed it and it held perfect!


Finally, add your rid-a-rac ribbon any which way you please!  I put mine on the arms and just down the front, leaving the back plan.  Deal.  :)
It's BACON!
Now I just need to get J back in it for a follow up photo.  Stay tuned my darlings...  :)
The Chen Family!  J as Bacon, Me as a slice of Cheesecake,
Bacon as an Egg and Cheesecake as a hotdog :)

Bacon and Cheesecake in front of the Halloween Mantel :)


Big (BACON!) Smile,

Thursday, October 20, 2011

Halloween Decor--on the cheap GURL!

Pin It


Happy thirsty Thursday Girls!!!!  Wow, can I just say THANK YOU for all the support on my last World's Biggest Whiner post?  For those of you who didn't read all about my timing whoas on Halloween Decor, I was basically complaining that I don't have enough time in the day to hand-make all the things I'd like to, and OMG, am I really about to BUY Halloween bunting?!?  Well, here's the update:  I DID buy it.  But I also made my own.  I totally caved.  In fact, I caved so much that I pretty much did hand-make and upcycle everything.  What is my deal?  I don't know, it really didn't take me as much time as I thought it would, seems how almost everything I used I already owned, or had on hand. Except for being one felt sheet short for my bunting.

So....wanna see my crazy go halloween stuff???  OK!
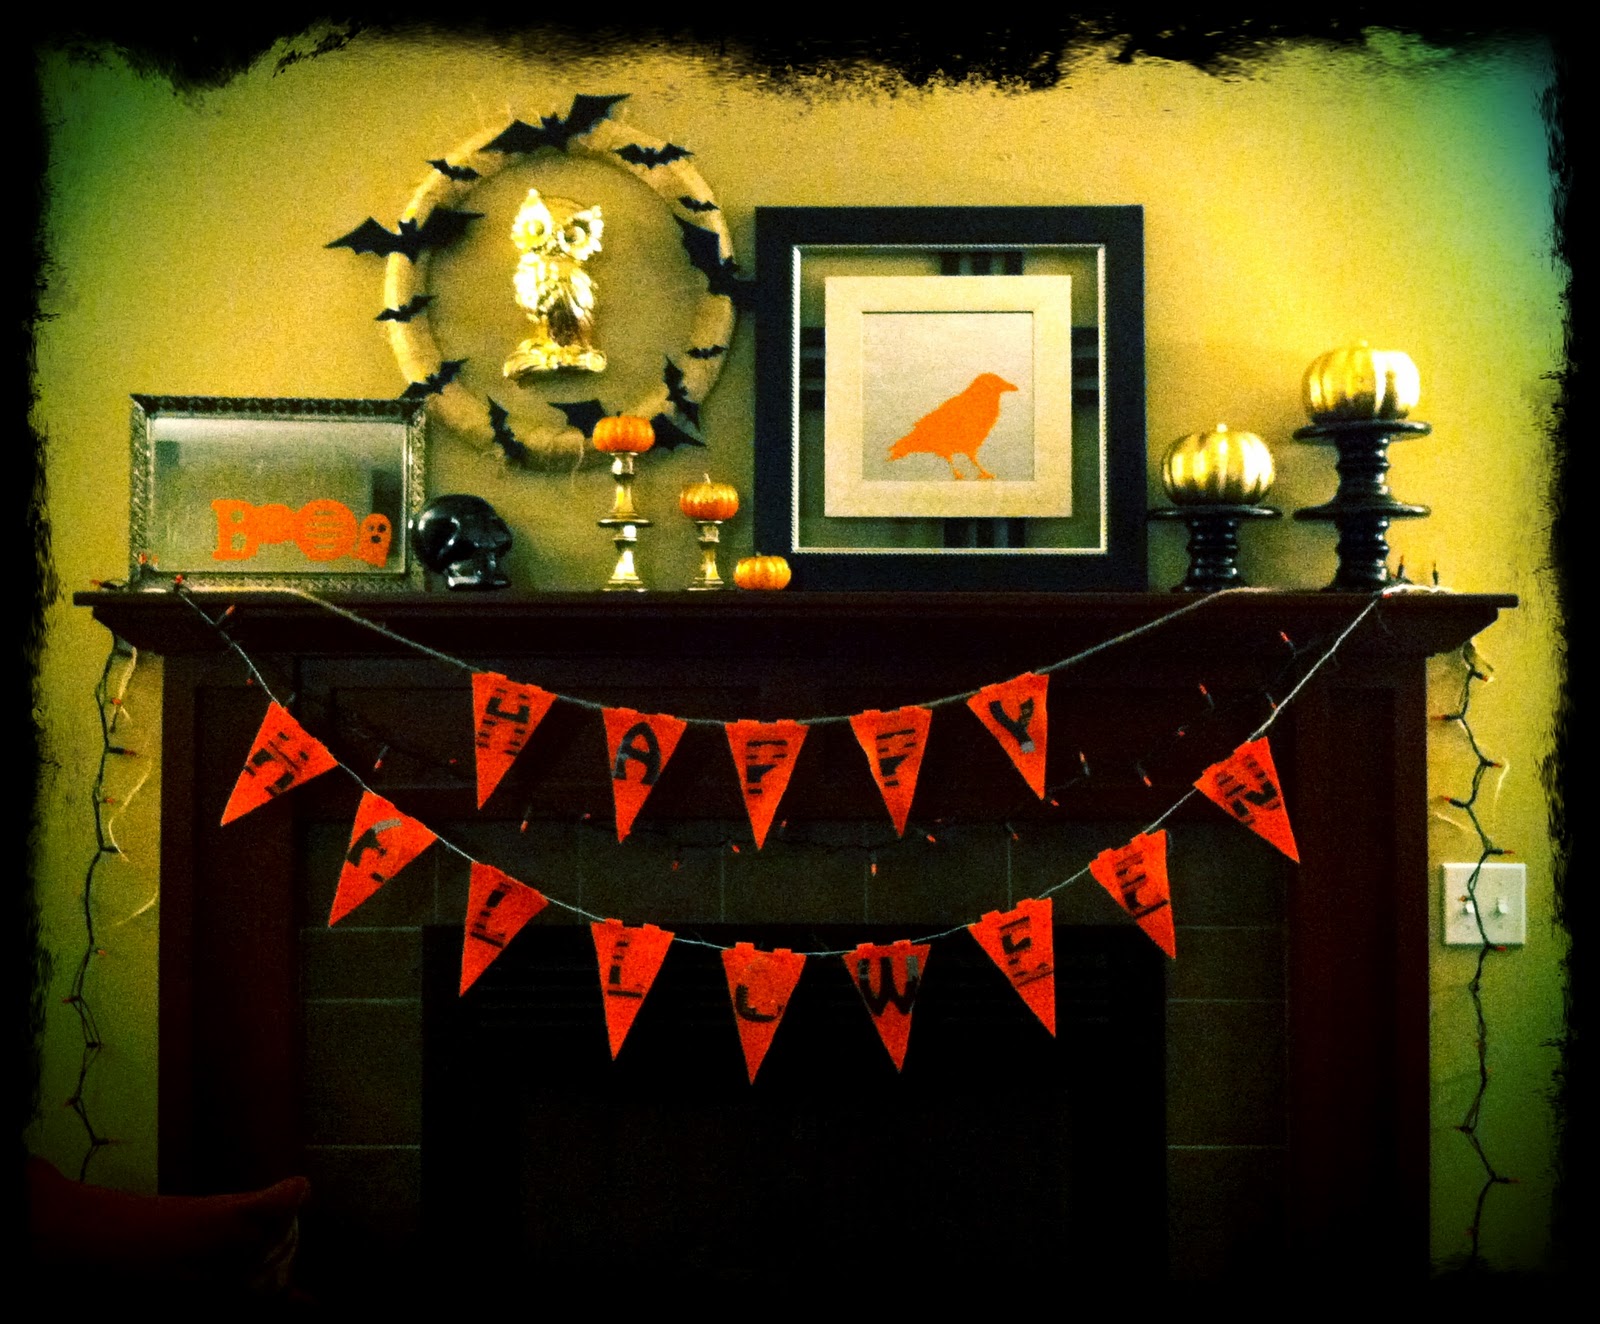
The Mantel.....Isn't she a beauty?  This is my first ever holiday driven mantel, you know, cause J Chen gets a little territorial on such things.....

The Bunting:  Made using the Sily as a pennant stencil and cutting out of orange felt. The letters were also cut from the Sily and hot glued to the pennants.  I used Jute and then some other weird jute-like rope I had (when the jute ran out).


From left to right....
The Boo Mirror Tray:  I picked up the tray from my favorite thrift store on half-off day over the summer for about $2.50.  I added the orange "BOO" using vinyl and my Sily.
Left side of the Mantel
The Black Skull:  Picked up from $ Tree and spray painted a glossy black.
The Wreath:  I used a large wire frame and wrapped it in burlap.  Next I cut out the bats using my Sily and black poster board from the $ Tree.  Then I just hot glued them on.
The Gold Owl:  LOVE HER!  I picked them (there's another!) up a couple weeks ago from a vintage shop for $2 a piece.  Engraved in the clay on the back is "1975" and a name.  VINTAGE YO!  I spray painted them gold.
Gold Candle Sticks and Mini Pumpkins:  I picked up the candle sticks at the $ Tree over the summer.  I spray painted them gold and then hot glued one on top of the other.  The mini pumpkins are REAL!  I painted on white glue to the tops and added gold glitter.  You can't really see them that well though....

The right side of the Mantel
From Right to Left:
Gold Pumpkins and Risers:  The pumpkins are also from the $ Tree, spray painted the same gold as all the other items.  The risers were used at our wedding in December 2007 for our candy buffet.   We start trends, ok?  Ok.  :)
The Mirror with the Crow:  The mirror was a Christmas present from my Mom in 2006 or 2007.  I added the crow using orange vinyl and my Sily, silly!  J Chen said it looked like Edger Allan Poe.  It's not a RAVEN, ok?

I'm planning on making a tablescape for the actual party, but I won't be able to get final pictures of that until that day.  Cause we're using our kitchen table, and again, J Chen gets all territorial over common areas.....BUT, I am able to show you this custom sunburst mirror I made just for the spot!

Try it yourself with my sunburst mirror tutorial!  
I used a plastic skull platter from the $ Tree and spray painted it black--as well as all the wooden dowels I had laying around (broke in half).  I had the mirror from a previous trip to the Hobbit Lobbit.  The little gold things on the dowels are spider and bat rings from the $ Tree, spray painted the same gold as every. thing. else.

I can't wait to show you the rest of the tablescape then it comes together!  Sure, it will likely be past Halloween Party Time, but you know, there's always next year :)

PS, I'll be using the store-bought bunting on the tablescape ;-)

Big (why sleep when you can create?) Smile,

Tuesday, October 18, 2011

What is your time worth to you?


So, I know that I'm not the only one who struggles with there not being enough time in the day to get everything you need to get done. And I don't even have kids! What I do have is a full time job, a part-time b.cheniful job, this blog, an FB page, a husband, Bacon and Cheesecake, and well, a life. And right now I also have a bunch of craft shows--I know, you're SICK to death of hearing about it, I get it. But, I do. I'm (we're) also throwing a Halloween/Birthday party on the 29th of this month. You know, like less than 2 weeks out. I started "decorating" last night. A pretty piss-poor attempt, at that.

This is where the question comes in....and what I'm currently agonizing over. Ok, so maybe not agonizing, but conflicted. Very conflicted. I'm crafty as shit, right? Right. And I see all these awesome ideas on Pinterest and I want to do/make them all. BUT, dude, that takes time. More time than I have. Cause I have to sleep. Cause sleeping keeps you skinny, you know? Chenyways, back to the point.....It's like, ok, do I buy halloween bunting for $4 rather than spending the time making it? Sure, it's not perfect, but it's not so horrible either. And it's DONE. All I have to do is hang the damn thing. But then I feel like I'm wasting my talents. I could totally make something better, but that would take me at least an hour from start to finish, and that's if I have all the supplies on hand...I don't know...I guess I'm worth the $4, but am I just selling my soul to calm my stresses?

Big (damn I'm a whiner) Smile,

Thursday, October 13, 2011

Onesie MANIA

Pin It


No, for real. It's MADNESS in the lower level of the Chen house.  Onesies everywhere.  J Chen LOVES craft show season!  :)

So yeah, took a break from all that wreath creating and moved on to baby onesies.  I started doing them this summer for Leah's little guy.  That was before my Sily had arrived so I did them all the freezer paper way.  But now I'm rockin the iron on transfer vinyl, and well, the world is mine.  And I'm free to make as many whitty/off-color/darling ensembles as I choose.  :)  Mommies beware.  

So, it's clear for the most part that girly onesies really corner the market.  I mean, it's all about the cupcake, (which I freaking LOVE, don't get me wrong girl!) the tutus, the cupcake tutus, you get the point.  So I wanted to make sure that I had some boy choices, too.  Seems how I specialize in wreaths and hairbands, I'm not exactly dude-friendly.  Little or otherwise.  So I took to my Facebook page and asked Moms of little boys what they want to see.  I got some suggestions of "rocker baby" gear as well as a request for more "Michigangster" goodness.  Being the pleaser I am, I took to it right away!  So, without further incoherent ramblings ado, here they are!

Let's hear it for the boys!

This reminds me soooo much of my Dad, Rexer!  There's this picture of him from the
late 70s where he has this long silky brown hair and this Mr. Pringles mustache.  Needless
to say, this little guy means a lot to me :)

Life is too short to listen to bad music.  amiright?

Baby, you are THE rock star!


Hello Mister Mans....

Look familiar?  Michigangster in Red.

This is the classy version ;-)
Alright, now let's give it up for the little LADIES!
All the flowers are detachable--you know, in case Mom wants to wear it!  Or, and because babies make gross messes and you're gonna have to wash this, like, 8 times a day!

Single strand with a delicate flower pin 

I really feel like this one is a timeless beauty.  Color Combo?  Stupid awesome.
ROCK IT GIRL!

This one I actually did with freezer paper.  The metallic gold is really awesome
in real life....however this photo, it's kinda eh.  

Just cause she's a girl doesn't mean she can't be a little
Gangsta too!  Hot pink for the little ladies :)

About the off-color comment?  I'm sure they'll be hitting a blog post near you soon.  :)

Stay awesome my Friends!!!!

Big (Rock that Onesie Babe!) Smile,